
This tutorial describes the steps you should follow to install and use the Multipath I/O (MPIO) feature on a host running Windows Server 2016 and connected to a SAN Storage by using iSCSI technology.
Multipath I/O (MPIO) feature in Windows Server to help build highly available, fault-tolerant iSCSI network configurations. MPIO uses redundant physical path components such as adapters, cables, and switches to create logical paths between the server and the storage device. If there is a component failure, causing a logical path to fail, multipathing logic uses an alternate path for I/O so that applications can still access their data.
Steps for MPIO Installation and Configuration
When you’re setting up MPIO in Windows Server 2012 or 2016, it requires a few steps.
- Adding the MPIO Windows Feature
- Reboot
- Configuring the Add support for iSCSI devices for your particular SAN device
- Reboot
- Configure iSCSI connections with Enable multi-path
- Add all the connections for each target, enabling multi-path
- Check multi-path MPIO connections
Each of the preceding steps is discussed below in detail.
To install MPIO feature, Open Server Manager on your Windows Server host. click Start > Server Manager.
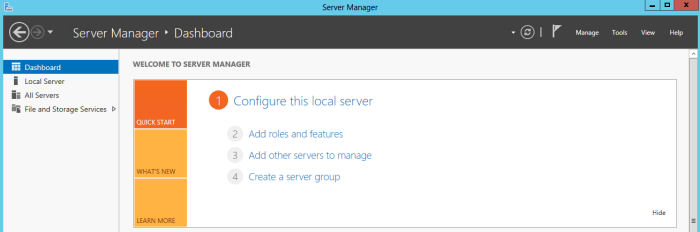
Click Server Manager > Dashboard > Add roles and features. This starts the Add Roles and Features wizard.

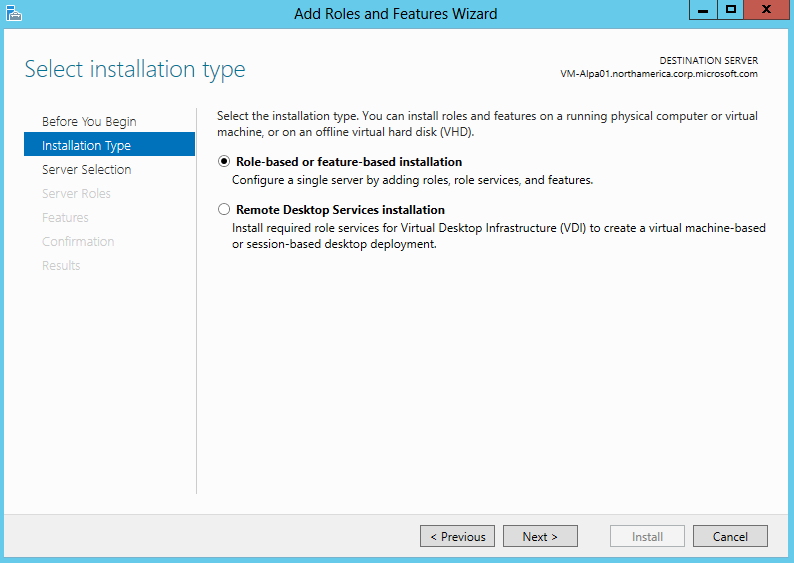
On the Select installation type page, accept the default setting of Role-based or feature-based installation. Click Next.
On the Select destination server page, choose Select a server from the server pool. Your host server should be discovered automatically. Click Next.
On the Select server roles page, click Next.
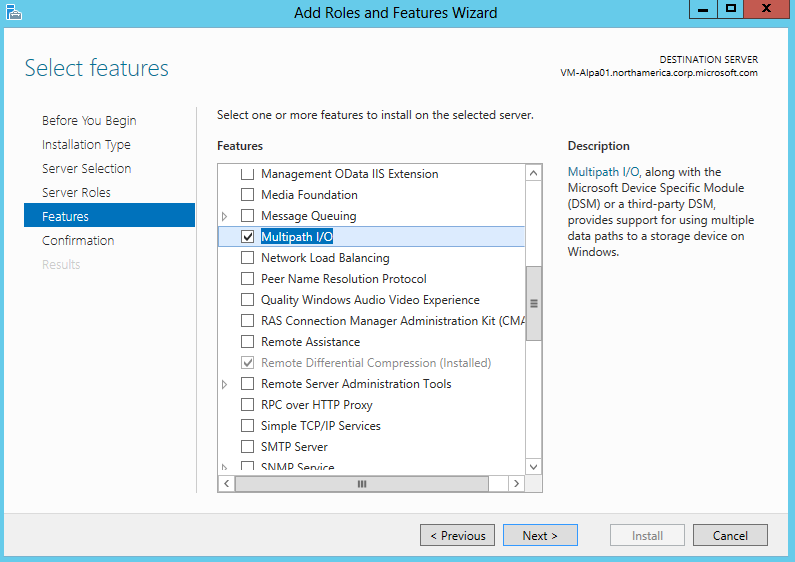
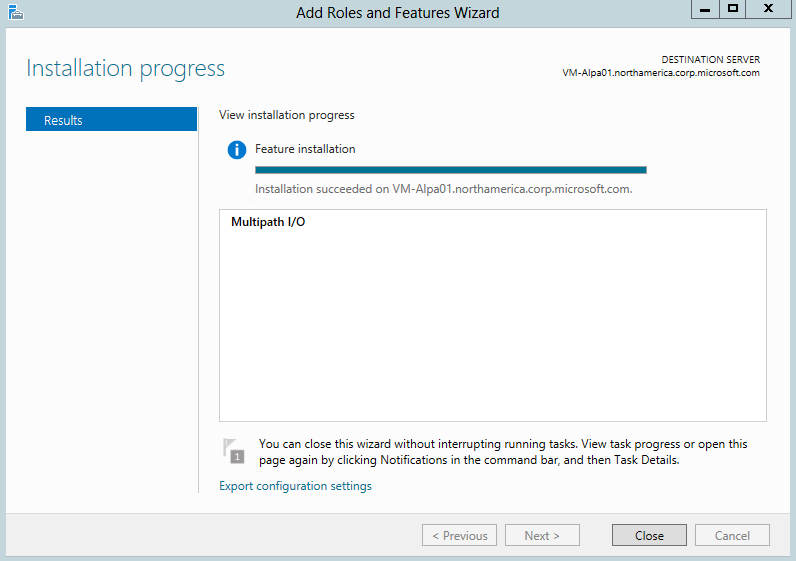
On the Select features page, select Multipath I/O, and click Next.
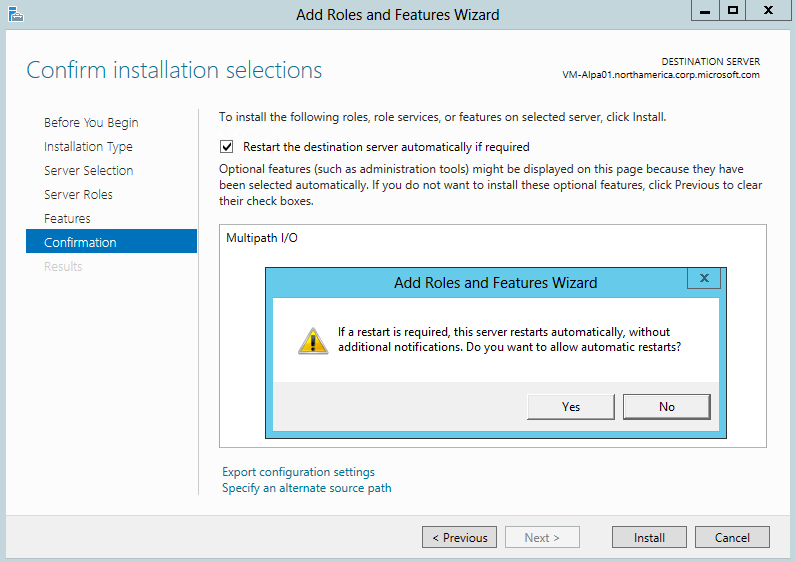
On the Confirm installation selections page, confirm the selection, and then select Restart the destination server automatically if required, as shown below. Click Install.
You are notified when the installation is complete. Click Close to close the wizard.
OR simply you can install MPIO role from Windows PowerShell as well.
# get-service -name MSiSCSI | start-service Set-Service -Name msiscsi -StartupType Automatic
# Install-WindowsFeature -name Multipath-IO
Note:
The first command will start the iSCSI service, and changes the start up setting to automatic. The second command will install the windows feature for MPIO.
Once MPIO is installed and the server has been rebooted, you can now configure MPIO for iSCSI connections.
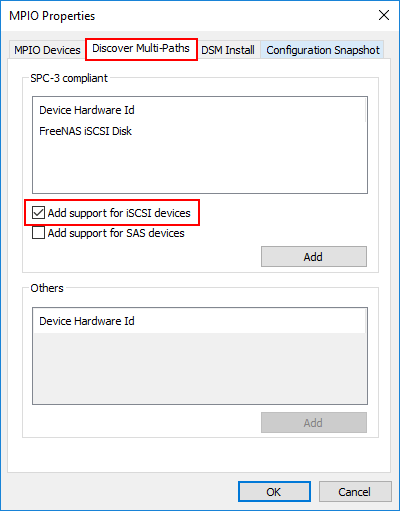
- Launch the MPIO utility by typing mpiocpl at a run menu. This will launch the MPIO Properties configuration dialog.
- Under the Discover Multi-Paths tab, check the Add support for iSCSI devices check box.
- Click OK and Afterwards, click the Add button. You will be prompted for a reboot.
Adding iSCSI Connections with MPIO
Open the iSCSI Initiator Properties window on the Windows Server host. Click Server Manager > Dashboard > Tools > iSCSI Initiator.
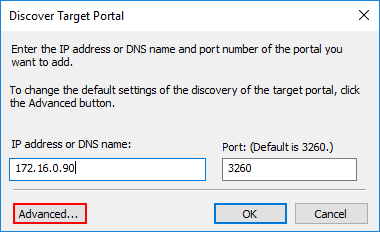
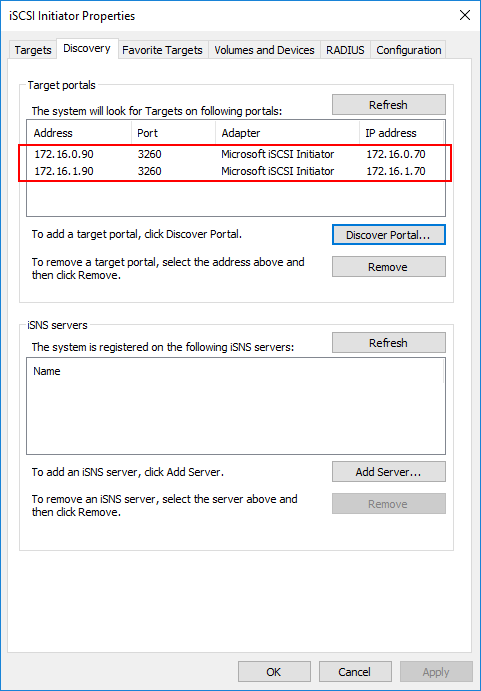
In the iSCSI Initiator Properties dialog box, click the Discovery tab, and then click Discover Target Portal.

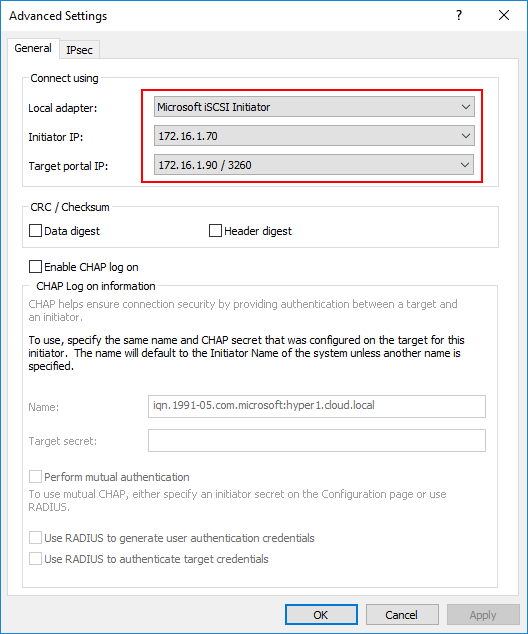
Next, Enter your first iSCSI IP address, then click the Advanced button.
Under the Advanced Settings, you can set a specific Local adapter and Initiator IP.
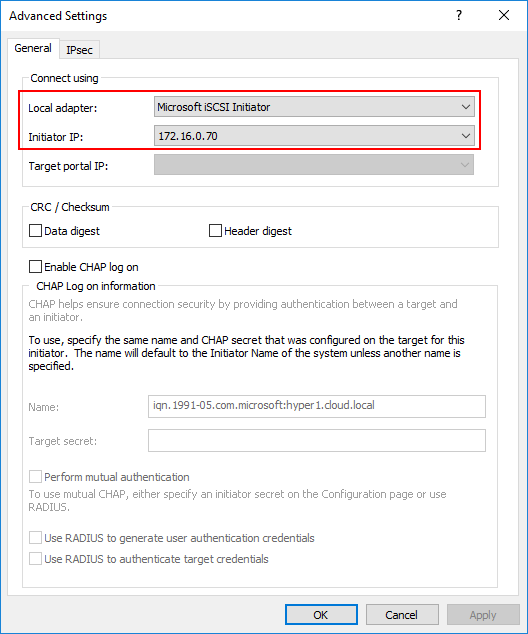
Do this for your multiple target portals. As you can see below, I have different target portal IPs that have been added using the specific network adapter that aligns with the target portal network address/subnet.
After adding the portals, click on the Targets tab. You will see the Discovered targets and they will most likely be in the Inactive status. Click the Connect button.
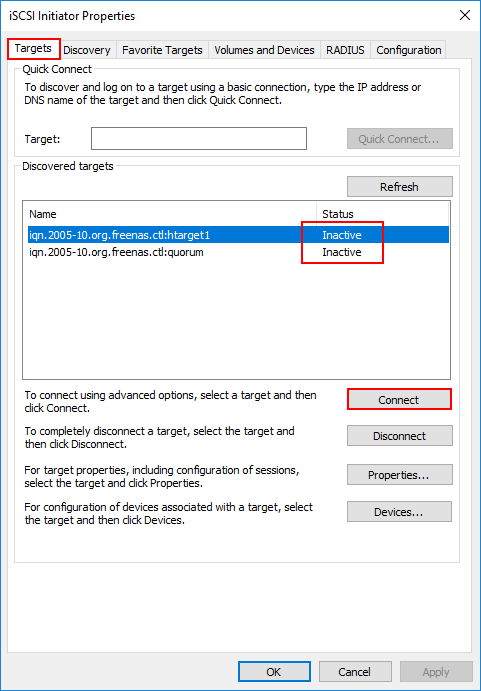
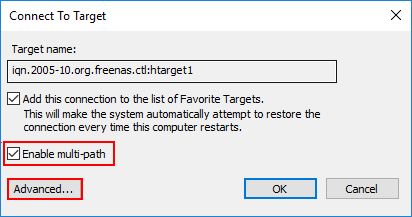
On the Connect to Target dialog box, click the Enable multi-path checkbox and then click the Advanced button.
Here is where the actual magic of the MPIO connections comes into play. Below, I am setting the Local adapter, then the Initiator IP and Target portal IP. So our end goal here is to setup the connections using each portal adapter IP.
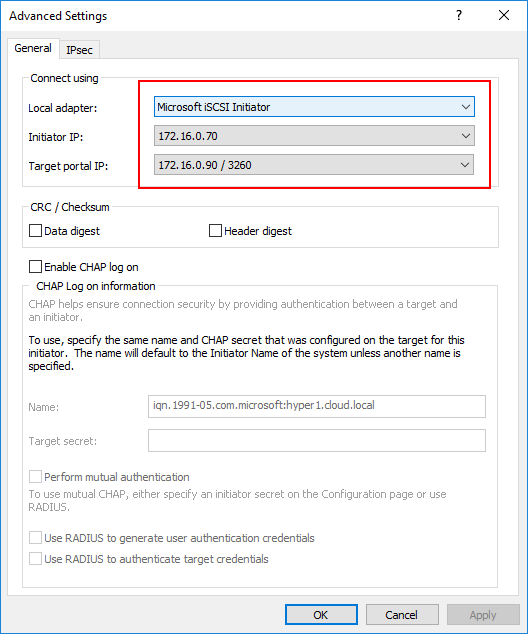
Click the Connect button again on the same discovered target. Now, I use the second Initiator IPand Target portal IP for the second connection to the same target.
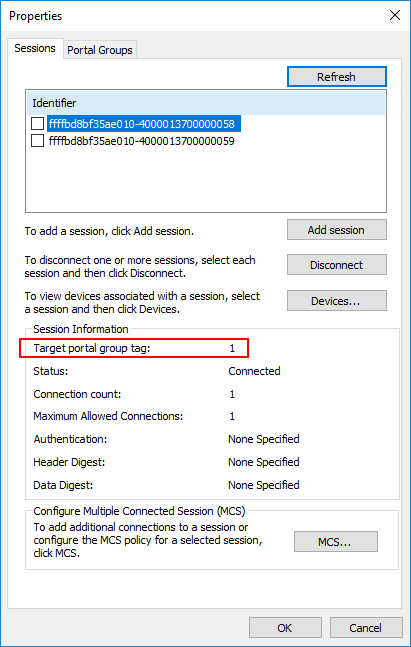
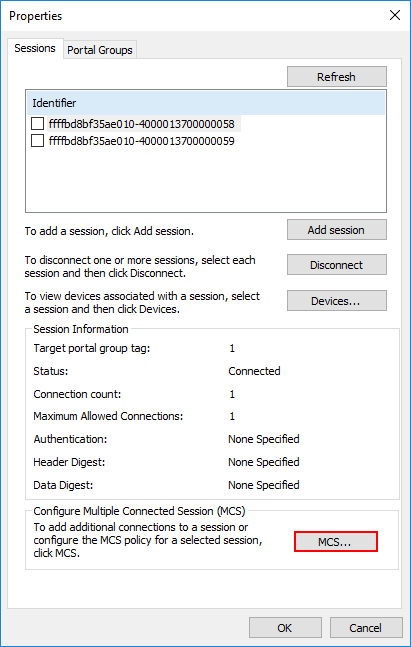
Now we see the Connected status. Click the Properties button so you can verify the MPIO status.

Notice you have two identifiers. Click each one and you will see the respective Target portal group tag.
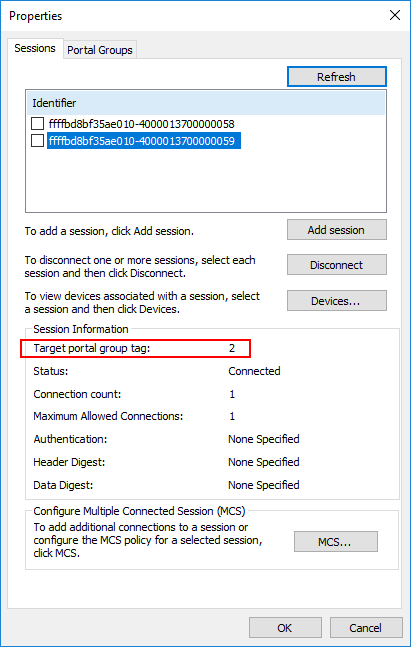
Clicking on the second Identifier and notice the Target portal group tag is the second group tag.
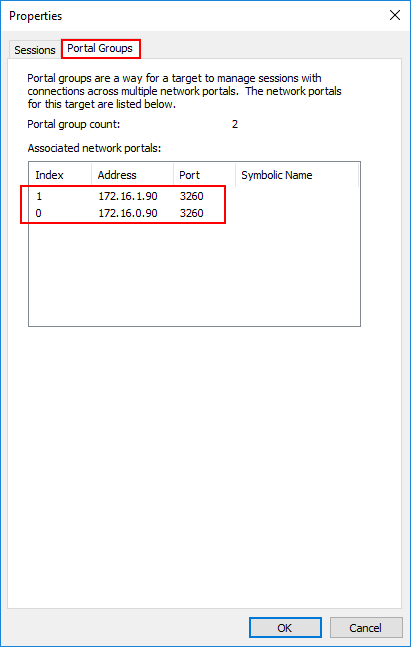
Click the Portal Groups tab and you should see both Associated network portals.
For each Identifier, you can Configurer Multiple Connected Session settings by clicking the MCS button.
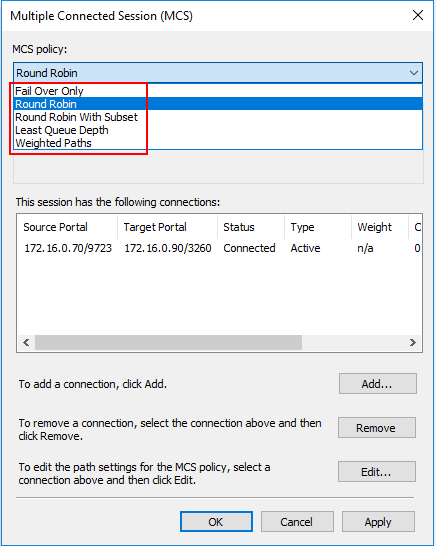
Note the MCS policy options that control the multi-pathing behavior. Options are:
- Fail Over Only
- Round Robin
- Round Robin With Subset
- Least Queue Depth
- Weighted Paths
iSCSI MPIO Multi-path connections verification
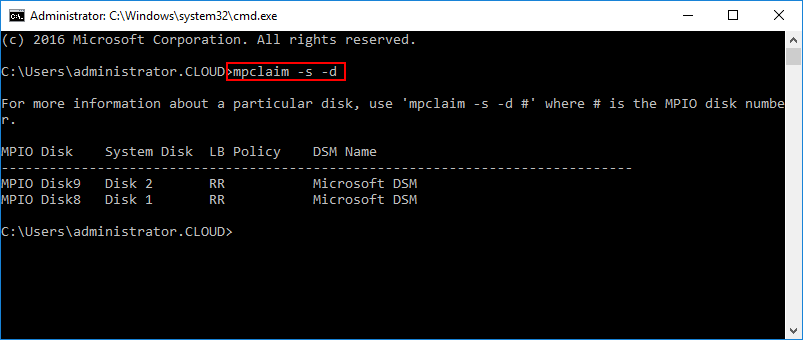
Open command prompt and verify the connection status by using MPIO builtin utility mpclaim. Below, you can see your MPIO enabled devices with the command:
- mpclaim -s -d
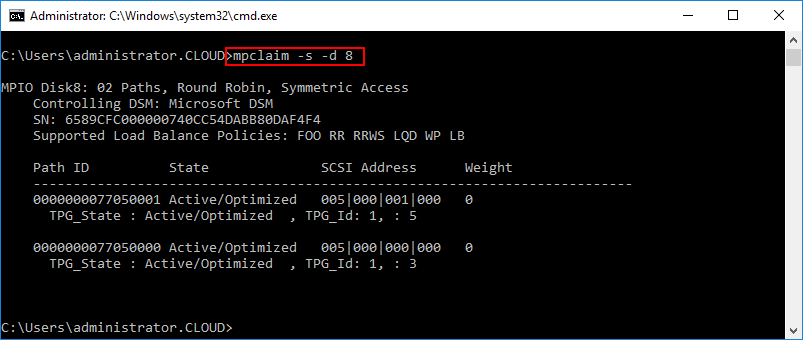
To look at the multipath information for a specific device use:
- mpclaim -s -d <device ID>
You can see below, I have two active paths to the specific device ID queried. State is Active/Optimized.
Conclusion
Configuring MPIO from Windows Server is a necessary configuration step that allows Windows to take advantage of multiple paths to iSCSI storage. By designing an iSCSI storage solution correctly and keeping in mind various technologies that allow iSCSI to be both performant and resilient, Hyper-V administrators can achieve high availability without sacrificing performance.