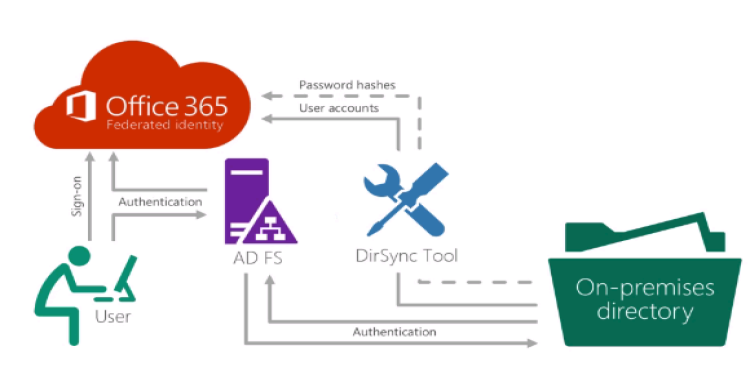
AD FS provides simplified, secured identity federation and Web single sign-on (SSO) capabilities. Federation with Azure AD enables users to authenticate using on-premises credentials and access all resources in cloud. As a result, it becomes important to have a highly available AD FS infrastructure to ensure access to resources both on-premises and in the cloud.
Introducing Federation with Azure AD
Federation is a collection of domains that have established trust. The level of trust may vary, but typically includes authentication and almost always includes authorization.
We can federate your on-premises environment with Azure AD and use this federation for authentication and authorization. This sign-in method ensures that all user authentication occurs on-premises. This method allows administrators to implement more rigorous levels of access control.
Architectural Diagram

If we need highly available Federation, then we have to set up “password hash synchronization” option as a backup in case ADFS infrastructure fails.
ADFS configuration prerequisites
- Windows Remote Management
If the target server is domain joined, then ensure that Windows Remote Managed is enabled
In an elevated PS command window, use command
Enable-PSRemoting –Force
- SSL Certificate
It’s strongly recommended to use the same SSL certificate across all nodes of your AD FS farm and all Web Application proxy servers. The certificate must be an X509 certificate.
You can use a self-signed certificate on federation servers in a test lab environment. However, for a production environment, I recommend that you obtain the certificate from a public CA
The identity of the certificate must match the federation service name (for example, sts.contoso.com)
- Name resolution for federation servers
Set up DNS records for the AD FS federation service name (for example sts.contoso.com) for both the intranet (your internal DNS server) and the extranet (public DNS through your domain registrar). For the intranet DNS record, ensure that you use A records and not CNAME records. This is required for windows authentication to work correctly from your domain joined machine.
After configure the prerequisites, next we install Azure AD Connect tool.
Installation of Azure AD Connect
Download Microsoft Azure Active Directory Connect from here
- Sign in as a local administrator to the server you wish to install Azure AD Connect on. You should do this on the server you wish to be the sync server.
- Navigate to and double-click AzureADConnect.msi.
- On the Welcome screen, select the box agreeing to the licensing terms and click Continue.
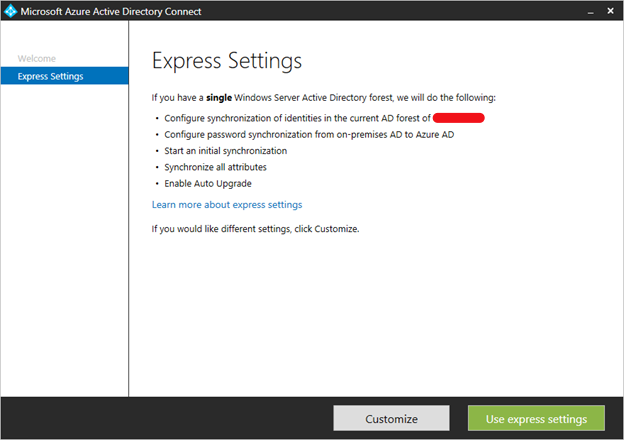
- On the Express settings screen, click Use Customize settings.
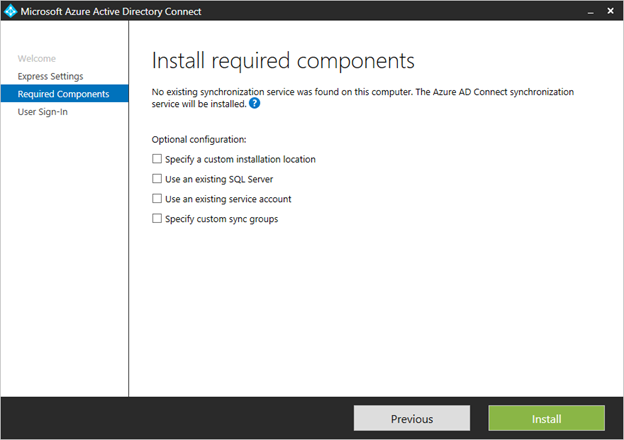
Install required components
When you install the synchronization services, you can leave the optional configuration section unchecked and Azure AD Connect sets up everything automatically. It sets up a SQL Server 2012 Express LocalDB instance, create the appropriate groups, and assign permissions.
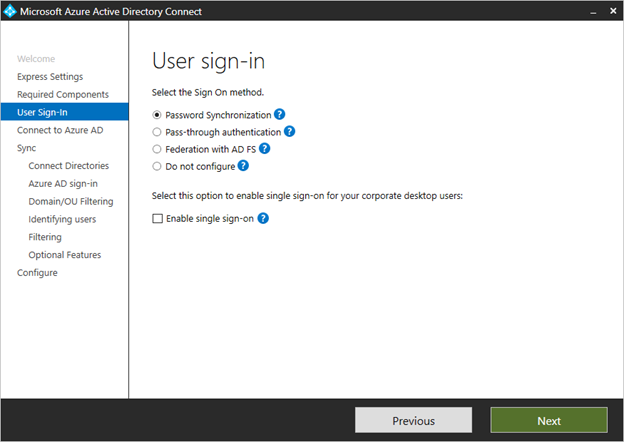
User sign-in
After installing the required components, you are asked to select your user’s single sign-on method. In our case, we’ll select Federation with ADFS.
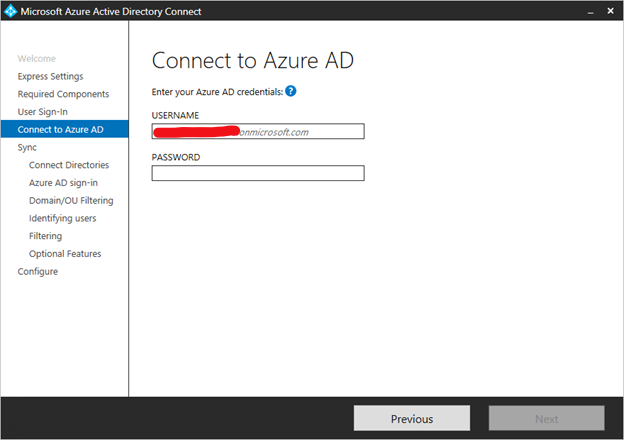
Connect to Azure AD
On the Connect to Azure AD screen, enter a global admin account and password.
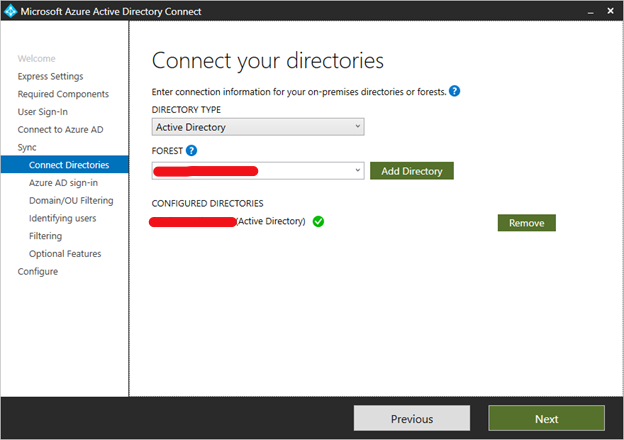
Connect your directories
To connect to your Active Directory Domain Service, Azure AD Connect needs the forest name and credentials of an account with sufficient permissions.
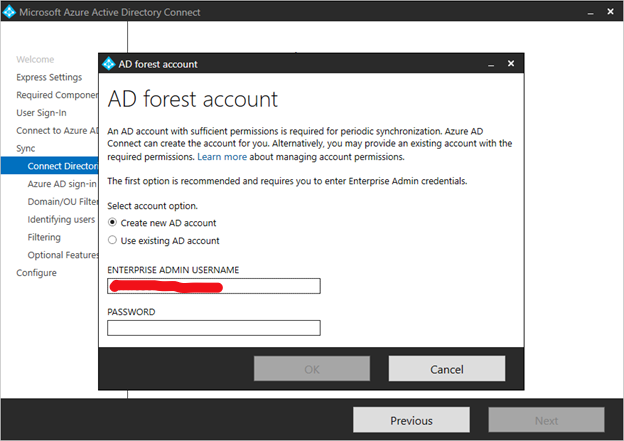
After entering the forest name and clicking Add Directory, a pop-up dialog appears and prompts to create a new account or use existing account required by Azure AD Connect for connecting to the AD forest during directory synchronization.
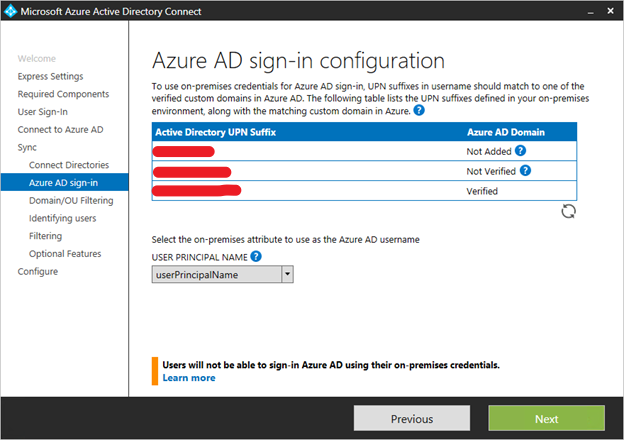
Azure AD sign-in configuration
This page allows you to review the UPN domains present in on-premises AD DS and which have been verified in Azure AD. This page also allows you to configure the attribute to use for the userPrincipalName.
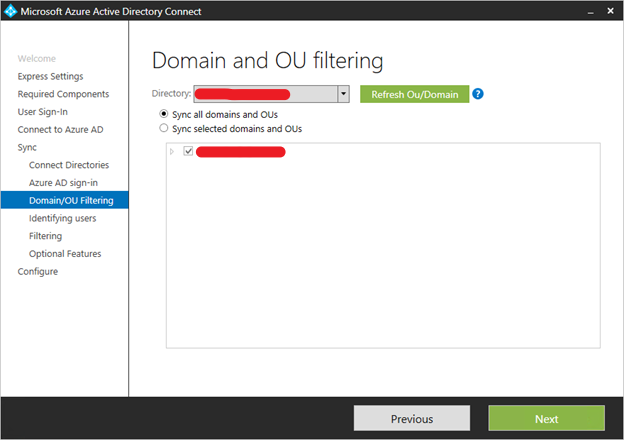
Domain and OU filtering
By default all domains and OUs are synchronized. If there are some domains or OUs you do not want to synchronize to Azure AD, you can unselect these domains and OUs.
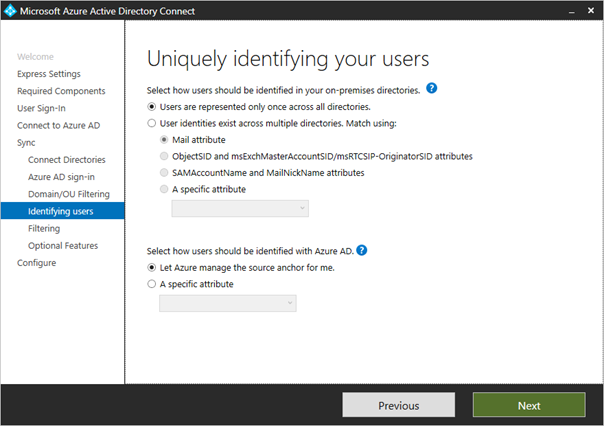
Uniquely identifying your users
The Matching across forests feature allows you to define how users from your AD DS forests are represented in Azure AD. A user might either be represented only once across all forests or have a combination of enabled and disabled accounts. The user might also be represented as a contact in some forests.
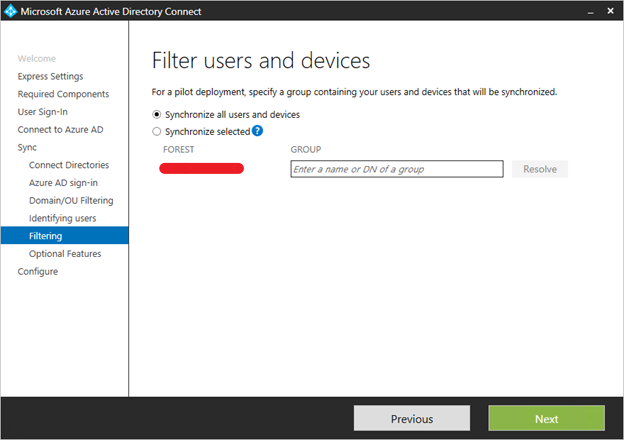
Sync filtering based on groups
The filtering on groups feature allows you to sync only a small subset of objects for a pilot. To use this feature, create a group for this purpose in your on-premises Active Directory. Then add users and groups that should be synchronized to Azure AD as direct members. You can later add and remove users to this group to maintain the list of objects that should be present in Azure AD. All objects you want to synchronize must be a direct member of the group. Users, groups, contacts, and computers/devices must all be direct members. Nested group membership is not resolved. When you add a group as a member, only the group itself is added and not its members.
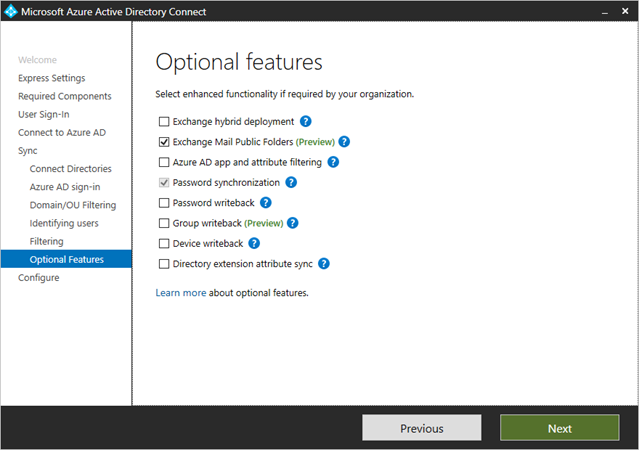
Optional Features
This screen allows you to select the optional features for your specific scenarios.
Create a new ADFS farm or use an existing ADFS farm
You can use an existing AD FS farm or you can choose to create a new AD FS farm. If you choose to create a new one, you are required to provide the SSL certificate. If the SSL certificate is protected by a password, you are prompted for the password.

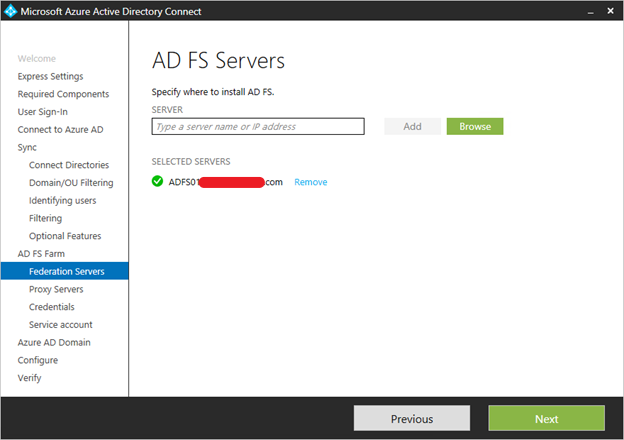
Specify the ADFS Servers
Enter the servers that you want to install ADFS on.
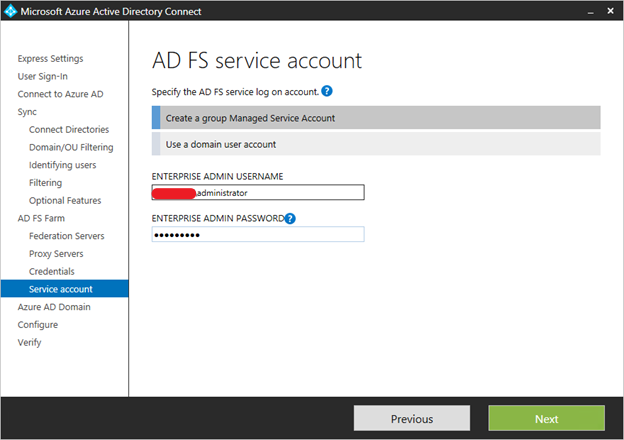
Specify the service account for the ADFS service
The AD FS service requires a domain service account to authenticate users and lookup user information in Active Directory.
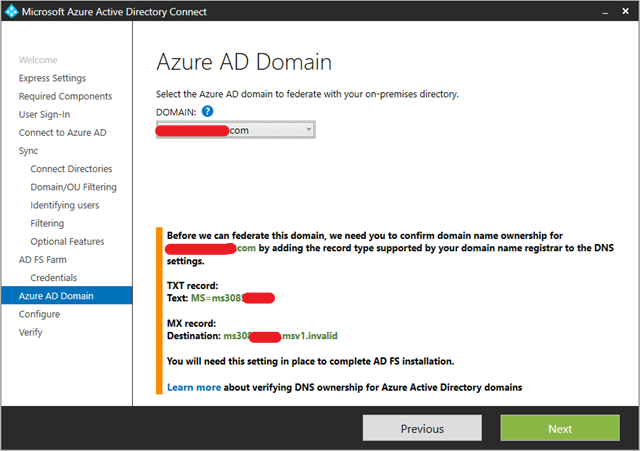
Select the Azure AD domain that you wish to federate
This configuration is used to setup the federation relationship between AD FS and Azure AD. It configures ADFS to issue security tokens to Azure AD and configures Azure AD to trust the tokens from this specific ADFS instance. This page only allows you to configure a single domain in the initial installation. You can configure more domains later by running Azure AD Connect again.

Verify the Azure AD domain selected for federation
When you select the domain to be federated, Azure AD Connect provides you with necessary information to verify an unverified domain. See Add and verify the domain for how to use this information.
Configure and verify pages
Select start the synchronization as soon as possible.
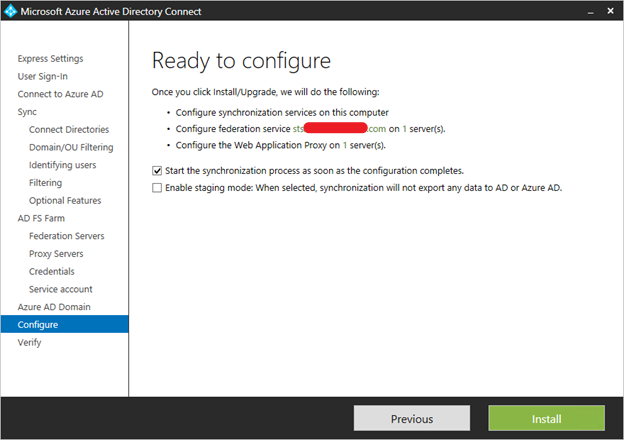
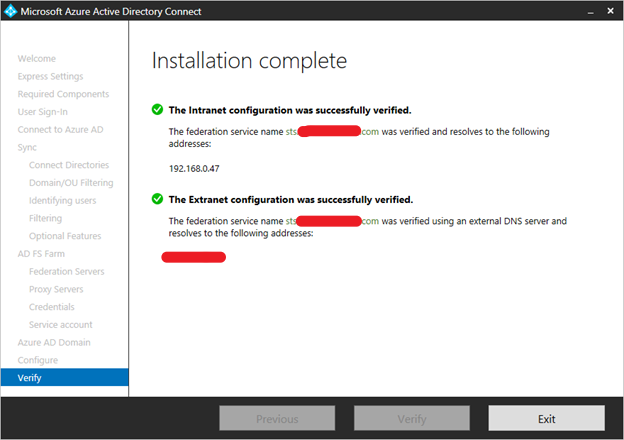
Verify your federation configuration
Azure AD Connect verifies the DNS settings for you when you click the Verify button.
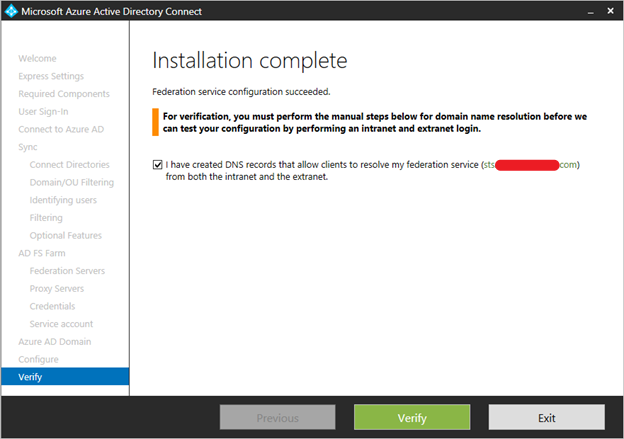
In addition, perform the following verification steps:
- Validate that you can sign in from a browser from a domain joined machine on the intranet: Connect to https://myapps.microsoft.com and verify the sign-in with your logged in account. The built-in ADDS administrator account is not synchronized and cannot be used for verification.
- Validate that you can sign in from a device from the extranet. On a home machine or a mobile device, connect to https://myapps.microsoft.com and supply your credentials.
- Validate rich client sign-in. Connect to https://testconnectivity.microsoft.com, choose the Office 365 tab and chose the Office 365 Single Sign-On Test